Advertisement
Advertisement
Advertisement
Advertisement
Windows 11 Incompatible with Your Device; Here is How to Fix it

Windows 11 Incompatible with Your Device; Here is How to Fix it

Windows 11 Incompatible with Your Device; Here is How to Fix it

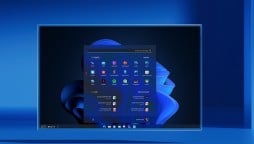
Windows 11 Incompatible Your this Device; Here is How to Fix it

Advertisement

Windows 11 was introduced with stricter requirements than Windows 10. This means that Windows 10 compatible devices may not be compatible with Windows 11.

Microsoft started testing Windows 11 in its Insider Program through Dev Channel. Microsoft also launched a testing program where it would tell whether your PC supports Windows 11 or not. However, it was removed, promising to bring back with an improved update just before Windows 11 release.

Nothing is lost if your device is incompatible, especially if Trusted Platform Module (TPM) is the component. It can simply be enabled in the BIOS settings to make the PC compatible.

Intel and AMD are both compatible with TPM. The options can be found in the BIOS to enable Intel Platform Trust Technology or AMD Platform Security Processor.

However, if TPM 2.0 is not supported there is still a chance to make the PC compatible.

Advertisement

If you encounter “This PC can’t run Windows 11” during setup, you may enforce compatibility by disabling some compatibility checks during setup.

Here is how it’s done;

  1. You get This PC can’t run Windows 11 when the PC is not compatible during setup, e.g. when you install Windows 11 from a disc or USB. You cannot proceed at this point as the “next” button is not activated.
  2. Press Shift-F10 to open a command prompt window.
  3. Type regedit and press the Enter key to load the Windows Registry Editor.
  4. Advertisement
  5. Navigate to HKEY_LOCAL_MACHINE\SYSTEM\Setup in the Registry Editor window.
  6. Right-click on Setup and select New > Key.
  7. Name it LabConfig and press the Enter key.
  8. Right-click on the new LabConfig key and select New > Dword (32-bit) Value.
  9. Name it BypassTPMCheck.
  10. Set its value to 1.
  11. Advertisement
  12. To disable the Secure Boot Check:
    1. Right-click on LabConfig and select New > Dword (32-bit) Value.
    2. Name it BypassSecureBootCheck.
    3. Set its value to 1.
    Advertisement
  13. To bypass the RAM check:
    1. Right-click on LabConfig and select New > Dword (32-bit) Value.
    2. Name it BypassRAMCheck.
    3. Set its value to 1.
    4. Advertisement
  14. Close the Registry Editor window.
  15. Type exit in the command prompt window and press the Enter key.
  16. Activate the back button in the top left corner of the “This PC can’t run Windows 11” window to go back and repeat the system requirements check.
  17. If everything worked out, TPM, secure boot, and RAM should not be a problem anymore during the compatibility check.
  18. Advertisement

However, several Windows features require TPM. These may not work at all or only partially.

The method may not work in all cases. But it’s worth a try if you are stuck for the reason that TPM, RAM, or secure boot is not supported.

Also Read

Windows 7, Windows 8.1 Will Not Support Direct Upgrade To Windows 11

Windows 7 or Windows 8.1 users cannot directly upgrade to the latest...

Advertisement
Advertisement
Read More News On

Catch all the Sci-Tech News, Breaking News Event and Latest News Updates on The BOL News


Download The BOL News App to get the Daily News Update & Follow us on Google News.


End of Article

Next Story