


How to use PugetBench for Photoshop


Credits: Google
Advertisement
- Puget Systems provides a variety of benchmarks that use automated real-world workloads.
- One of them, PugetBench for Photoshop, is quite easy to use.
- Some of them (like Pugetbench for Premiere Pro) are more sophisticated and take a bit to set up.
Advertisement
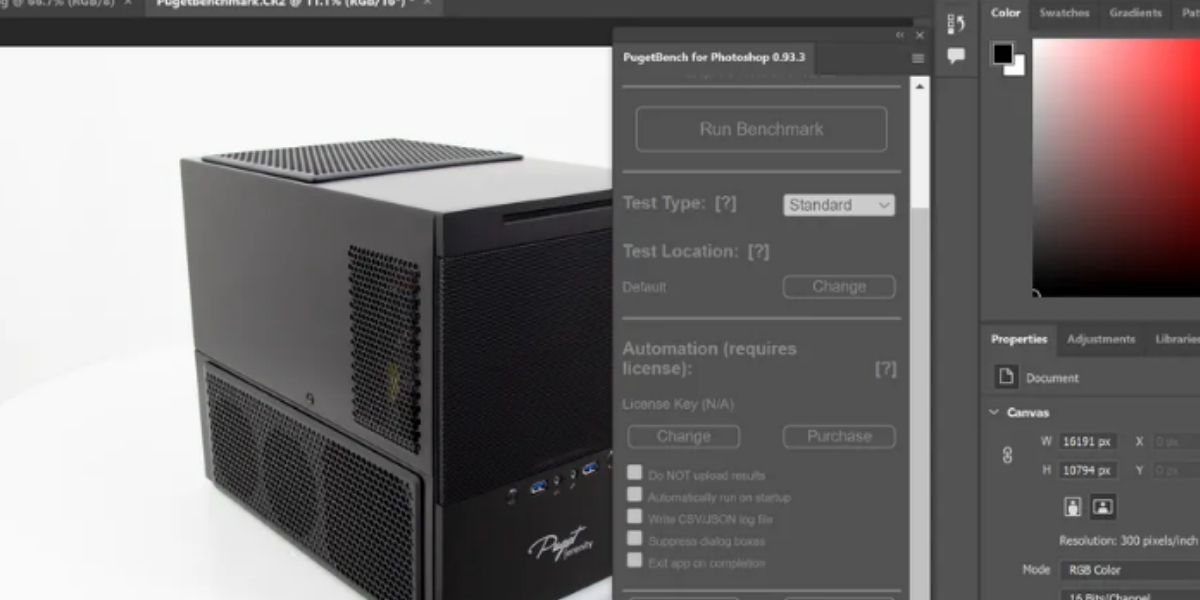
PugetBench for Photoshop tests your computer’s ability to do a variety of activities, such as mask refining and gradients, as well as filter tasks like as lens correction and noise reduction. The Photoshop test, unlike some of Puget’s other benchmarks, just requires the installation of one fast plug-in.
Read more: Calendars app from Readdle is now available on Mac
Note that the M1-native version of Photoshop does not currently support this benchmark.
- Go to Stock and Marketplace > Plugins in the Creative Cloud Desktop programme.
- Click Install after searching for PugetBench for Photoshop. Before installing the plug-in, make sure Photoshop is closed.
- Open Photoshop after the plug-in has been installed.
- To use PugetBench for Photoshop, go to Window > Extensions > PugetBench for Photoshop. In the pop-up box, enter your licence code (if you have one) and any other preferences you choose.
- To run a benchmark, select Run Benchmark.
Advertisement
PugetBench will handle the rest. Make sure you don’t move your mouse while the programme is running.


Advertisement
Read more: Verizon and AT&T will soon be allowed to use the good 5G
Your results will appear in the PugetBench window after the benchmark is completed. They’ll also be added to the PugetBench database, which is open to the public (unless you have a paid version). You may compare your results to those of other computers on this page. Each system receives a total score as well as scores for GPU and filter tasks.
Advertisement
Read More News On
Catch all the Business News, Breaking News Event and Latest News Updates on The BOL News
Download The BOL News App to get the Daily News Update & Live News.
Advertisement
End of Story
BOL Stories of the day


Advertisement
CORONAVIRUS OUTBREAK
Advertisement